Our post for Father’s Day, with a picture of ice cream cake made with our chocolate mayonnaise cake was so popular last weekend…quite literally it appears, folks are as crazy for paleo ice cream cake as we are! But then again, when you pair paleo chocolate mayonnaise cake and paleo ice cream together…duh! Who wouldn’t be crazy about having some!
We had several requests for some assembly instructions for this summer treat, which meant in order to take pictures…we had to make another ice cream cake!! Haha…not a problem, happy to make another variation! We made a smaller version this time since we knew we’d have a smaller crew around to help us eat it.
On that note, we chose a smaller vessel to make this cake in, so ingredients and directions are for a smaller version…but easy to double if you’re gonna make a larger cake for more quests! Ok, enough of the chit chat…let’s get to the details!!! Whoa…so many steps right?!?! Yep, many steps indeed…trust us, whoever you’re making this for will appreciate it to the max!!
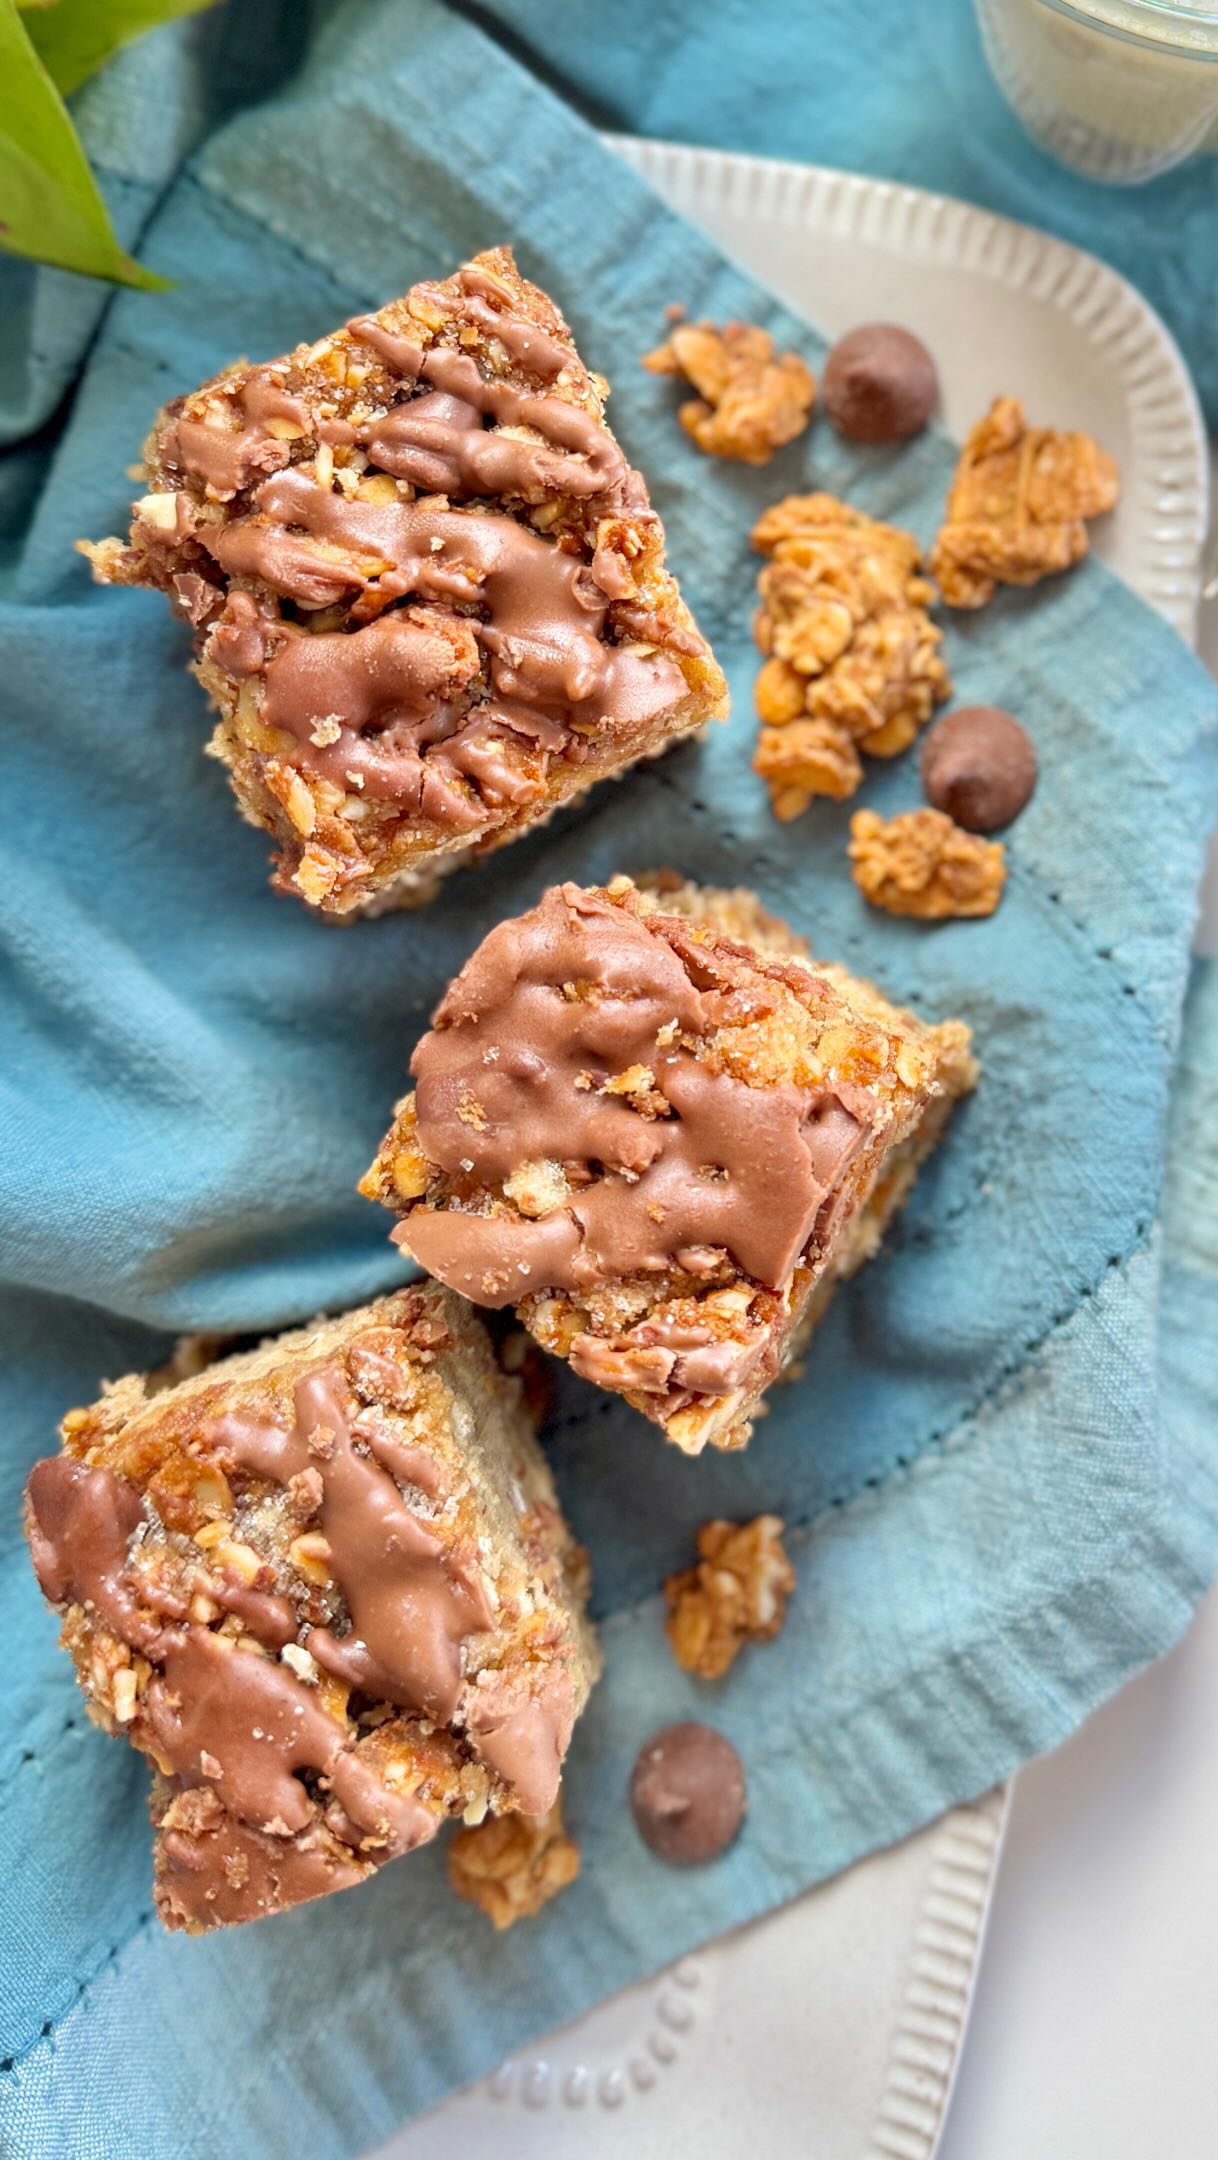
paleo turtle ice cream cake

paleo turtle ice cream cake, seriously decadent & delicious
Credit: backporchpaleo.com
Ingredients
- ½ recipe of our chocolate mayonnaise cake, baked and completely cooled
- 2 c of your favorite paleo ice cream, softened – we used Crio Bru* flavor for this cake
- 1 recipe of our chocolate crackle glaze
- 1 recipe of our soft caramel sauce, cooled
- ½ c chopped pecans and a few whole ones for decorating
Directions
- Most important, decide on the shape and size you want your ice cream cake to be and pick a container/vessel… AND also what you are going to serve it on. Making these decisions ahead of time will spare you anguish of having an ice cream cake ready to plate…but not having a platter/plate that will fit it!! ALSO, ahead of time, make sure you have room in your freezer for the container/vessel…no one wants precious paleo ice cream melting and waiting for you to hurriedly deciding how or where in the heck it’s going to go!!!!
- Bake your cake ahead of time in a cake pan that will also accommodate the thickness you want your cake to be as well as being able to cut out the pattern you’ll need for the ice cream cake.
- Trace “cake” pattern with an empty container/vessel onto a piece of parchment paper, trust me…this is MUCH easier with an empty, non frozen container!
- Line container/vessel with plastic wrap, this will most likely take several pieces of plastic. We prefer a glass container/vessel since the plastic wrap will cling to it more easily, but certainly not necessary. Be patient here and make sure you have enough plastic to have an “overhang” around the edges.
- Spoon softened paleo ice cream into the bottom of the container/vessel and use the back of a spatula to push it down completely. Fold plastic wrap over ice cream and you can now use your hands a bit to make sure it’s pushed down completely into the container/vessel.
- Place in freezer for a minimum of 4-6 hours, preferably overnight.
- Once ice cream portion is frozen, you need to prep the cake portion! Remove cake from pan. Use the parchment paper pattern made from step #3 – cut out the cake portion with a knife. DO NOT TOSS OUT THE CAKE SCRAPS! You will have leftover chocolate crackle and caramel, just drizzle them over the cake scraps…don’t let them go to waste!
- Remove vessel/container from freezer with ice cream layer, pull back plastic wrap and carefully place cut out cake onto the top of the ice cream layer and push down slightly to make sure you have a snug fit and that the cake is in full contact with the ice cream.
- Once again, fold the plastic wrap on top of this layer and gently push down again.
- Return to freezer and let it set for 4-6 hours, preferably overnight.
- When you’re ready to cover with chocolate, prepare the chocolate crackle glaze and soft caramel sauce. Make sure the caramel sauce is cooled.
- Take ice cream cake out of the freezer and let it set out for about 15-20 minutes so that it will release from container/vessel.
- Remove using plastic and place serving plate on top and flip over, remove plastic and position where you want it to be. Don’t worry if it’s not perfect, the chocolate will cover this right up!
- Before you pour warm chocolate crackle glaze over the cake, make sure you have the nuts close by…when the chocolate goes on the cake it will begin to harden so nuts will need to be sprinkled quickly on top.
- Pour about half of the warm chocolate crackle on top of cake and spread it with a spatula to help it pour over the sides of the cake, spoon more chocolate near the side of the cake and let it drizzle/freeze down the sides…add nuts to top of cake. Place back in freezer for a few minutes to let the chocolate completely freeze.
- Remove cake from freezer again, drizzle caramel over nuts and let it run down the cake. You can also drizzle more chocolate over the nuts as well and add decorative nuts to the side of the cake if you want, just use some of the chocolate like “glue” to add them to the sides of the cake. Trust me they will stick once the chocolate comes in contact with the cold cake!
- Return to freezer until ready to serve.
- Before serving, take cake out of the freezer and let it set for about 15-20 minutes to it can soften and be easier to cut.
- The chocolate will crack and fall apart depending on how thick it ended up being once you start cutting…so take a picture of the loveliness you just finished making before you dive in!
- Carefully cut and enjoy!!!!
*Crio Bru is basically brewed chocolate beans – we brewed it double strength and added it to our favorite paleo vanilla ice cream recipe!