Tag: paleo

  • air fryer pesto “cream” potato wedges

    air fryer pesto “cream” potato wedges

    paleo potatoes

    Paleo potatoes! As much as the question still comes up, “are white potatoes Paleo?” We are here to say, you better believe THEY ARE! In fact they’re even Whole30 compliant! As is this new and truly fantastic recipe! 

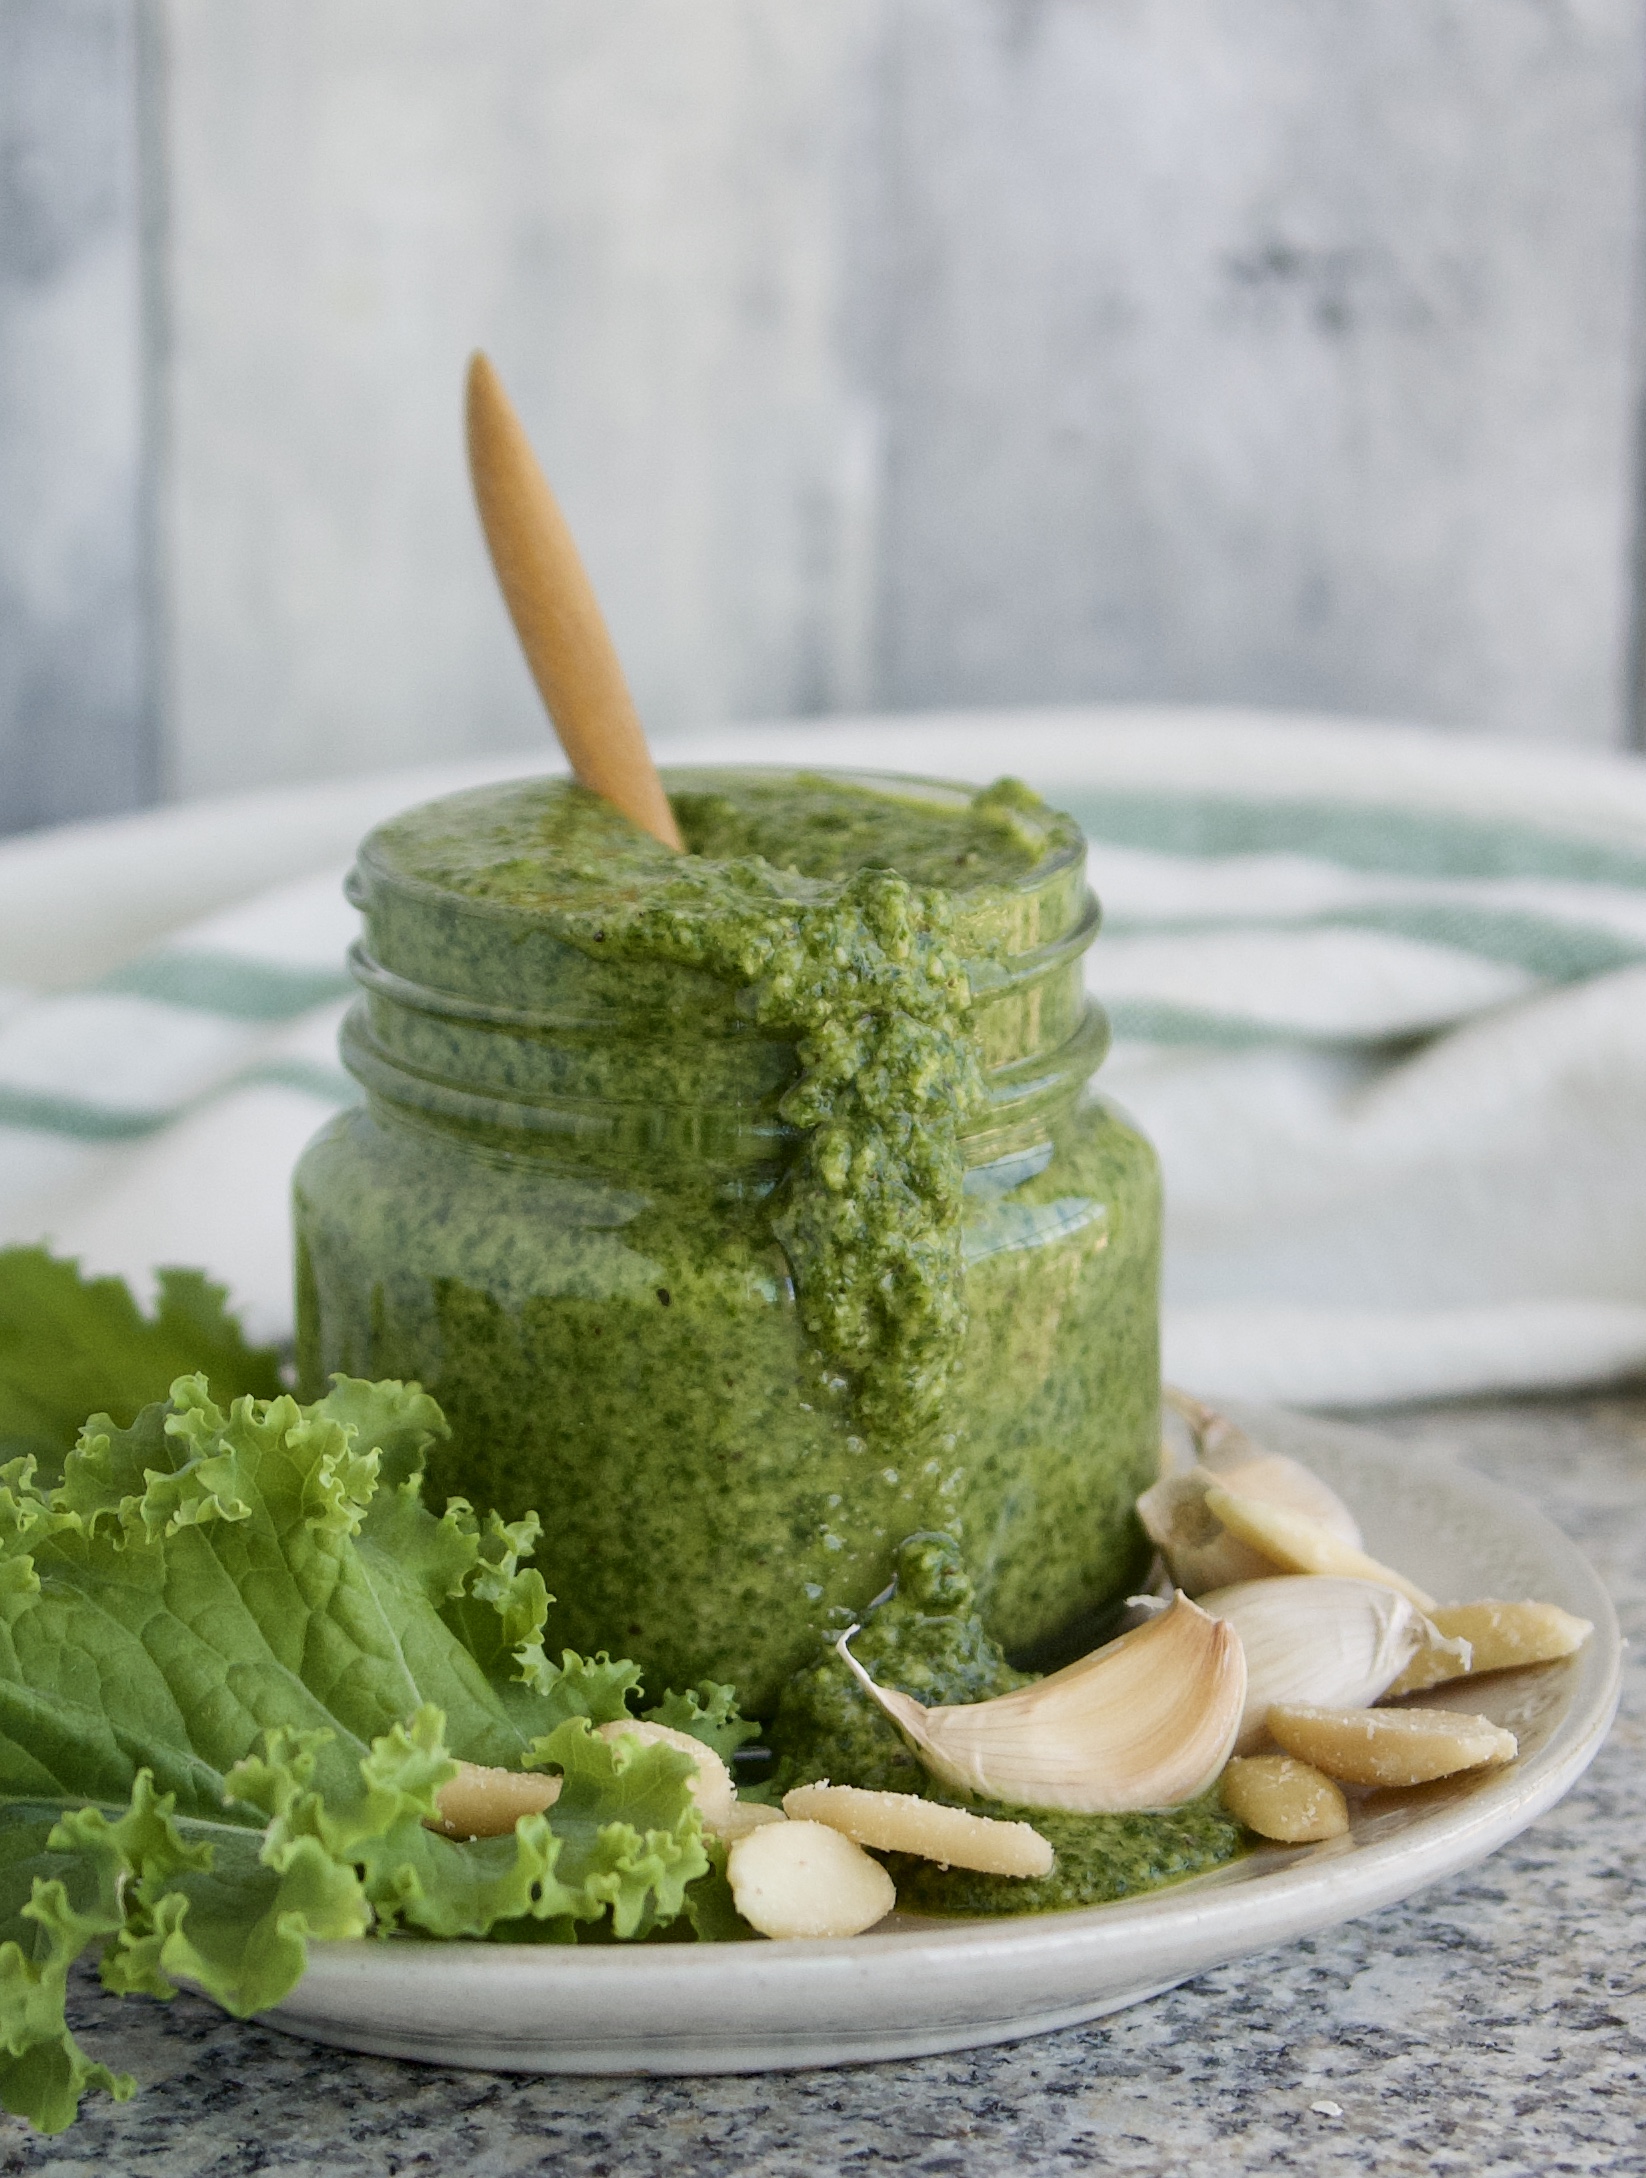
    After coming up with our DAIRY FREE KALE PESTO recipe a couple weeks ago, this seemed like the perfect dish to use it with. Who doesn’t want another option for paleo potatoes!? These tates are crispy on the outside while also soft and fluffy on the inside with a dreamy dairy free pesto “cream” sauce to dip them in. Could there be a more perfect finger food?! Rhetorical question by the way!

    Here’s the link to the Cuisinart Multi-function Air Fryer we LOVE!

    Lovingly referred to as “tates” in our home, potatoes are loved no matter the dish. Add the element of getting to enjoy them as a finger food and our taste buds literally smile.

    A few of our other POTATO LOVIN’ recipes:

    This pesto cream potato wedges are the perfect paleo potato side dish for almost any meal or can even be served as an appetizer. Minimal prep makes them a winner, bake up so fast in the AIR FRYER and the flavors and texture will have you reaching for them over and over again!

    Our favorite ingredients used in this recipe!

    air fryer pesto “cream” potato wedges

    Recipe by MichelleCourse: side dish, appetizersDifficulty: easy
    Servings

    4

    servings
    Prep time

    10

    minutes
    Cooking time

    12

    minutes

    Ingredients

    • 2-3 russet potatoes

    • 1 tblsp avocado oil

    • 1¼ tsp fine sea salt, divided

    • ¼ cup dairy free Kite Hill cream cheese

    • 3 tblsp of OUR dairy free Kale Pesto

    • 2-3 tblsp full fat coconut milk

    • 2 tsp fresh chives, chopped

    • Redmond Real Salt Kosher Salt (opt)

    Directions

    • Prepare the air fryer tray by spraying/brushing tray with avocado oil.
    • Wash russets well and dry with a paper towel. Cut lengthwise in half and then cut each half into 3-4 wedges. This will vary depending on how large the tates are. Just make sure each wedge is about the same size so they cook evenly.
    • Place wedges in a medium sized bowl and drizzle avocado oil over the top and toss to coat. Sprinkle with 1 tsp salt and toss again.
    • Lay wedges flat on the tray in a single layer. Place in the air fryer and bake at 400° for 10-12 minutes or until golden on the outside and soft on the inside.
    • While tates bake, place cream cheese, pesto, milk and remaining ¼ tsp salt in a small bowl and whisk till well combined. Schmear a couple tablespoons of cream on a serving platter and place the rest in a small serving bowl.
    • When tates are done, carefully place on a serving platter and drizzle a bit of the pesto cream on top, sprinkle with chopped chives and a shake or two of kosher salt if using.
      *to bake in the oven, preheat to 415° & prepare a baking sheet by lining with parchment paper and bake for 20 minutes. Remove tray from the oven, flip tates over and continue baking for 10-12 minutes or until golden.

    Our favorite ingredients used in this recipe!

  • dairy free kale pesto

    dairy free kale pesto

    dairy free kale pesto

    So kale has gained some popularity over the last few years. Rightfully so, as it’s packed with goodness! I had to wonder if a dairy free kale pesto was possible to enjoy all those nutrients without actually eating kale in a salad or sauteing. Often kale is not that popular and you either love it or hate it!

    Since we already had a basil pesto recipe and a Thai basil pesto recipe on the blog it was safe to assume that kale could make a great pesto as well, albeit a dairy free one. I’d also recently ordered some ground sumac after Teri, our friend over at No Crumbs Left, had suggested using it so many times on her Instagram stories. Thought the pair could be a great combo and I was not wrong.

    Speaking of kale, with the current pandemic I thought it was time to seek out a local CSA to join so I could support a local business and also enjoy some amazing produce. I’d seen Snuck Farms at a local health food store before so decided to look them up.

    Happily I found that there were multiple programs to choose from and I could pick up my order at a local smoothie place in their drive thru. Love that! My weekly order always has kale in it, so this amazing new pesto will be on hand often around here.

    dairy free kale pesto

    Our favorite ingredients used in this recipe!

    dairy free KALE PESTO

    • Difficulty: easy
    • Print

    a dairy free paleo KALE PESTO packed with tang


    Credit: backporchpaleo.com

    Ingredients

    • 2 cups kale, tightly packed
    • ½ cups Pili Hunters fried pili nuts
    • ¼ cup + 2T avocado oil
    • 2-3 cloves garlic, chopped
    • ¾ tsp Redmond Real Salt
    • 2 tblsp red wine vinegar
    • ½ tsp ground sumac
    • ¼ tsp black pepper
    • juice of half/whole lemon, depending on size

    Directions

    1. Remove leafy parts of the kale from the ribs of the leaf (discarding ribs) until you have 2 cups packed leaves. Make sure the blade is in the bottom of the food processor and place kale inside.
    2. Add pili nuts, avocado oil, garlic, salt, red wine vinegar, sumac, black pepper and the juice from half a lemon to start.
    3. Whirl away until all ingredients are fully combined, nuts and garlic are completely pulverized and you have a nice consistency.
    4. Taste adjusting salt and pepper and also add the remaining lemon juice if you want more tang for your taste buds. Whirl again until desired consistency then pour into an airtight container and enjoy on all the things!
    5. Can be stored in the refrigerator for up to two weeks.

  • paleo waffle cones

    paleo waffle cones

    paleo waffle cones

    PALEO WAFFLE CONES! Could summer get any better than this? We’re bringing the ice cream fun back with these! It’s the same recipe as our paleo pizzelles, but in a standard waffle cones size instead! Which means you can fill it with more ice cream!

    The original recipe was developed a few years ago as a birthday treat for my hubby so we could make some paleo Drumsticks. It was a hug hit and we ate them all summer long. While paleo pizzelles are great, these paleo waffle cones are even better since they’re bigger!

    paleo waffle cones

    Best tip for these cones, while that cone is still warm, place about 3-4 dark chocolate chips in the bottom and let them melt. You’re basically creating a tasty seal so ice cream doesn’t melt through onto your hands! Also, most waffle cone makers come with a little tool to shape them when they come out of the iron. I definitely found that using it was more clumsy, but if you want to give it a go.

    CHOCO TACOS you say, you bet! Place two chopsticks between two bowls or a large wooden spoon handle and when the cone comes off the hot iron, drape it over them to cool. Just like that you have a CHOCO TACO shell to fill with whatever flavor ice cream you enjoy most! If you’re feeling fun, melt a bit of chocolate and once the ice cream is firmed up inside the taco shell, dip it in the chocolate then add a few sprinkles. Ya, that’s summer in a bite for you right there!

    For this recipe you’ll need the following:

    paleo waffle cones

    Recipe by MichelleCourse: Our Favorites!, Recipes, Sweet TreatsCuisine: AmericanDifficulty: Easy
    Servings

    16

    waffle cones
    Prep time

    40

    minutes

    the ultimate PALEO WAFFLE CONE

    Ingredients

    • 1½ c cassava flour

    • 2 tsp baking powder

    • pinch of fine sea salt

    • 3 eggs, room temperature (*can sub a gelatin egg, but see details below)

    • ¾ c maple syrup

    • ½ c grass-fed butter, melted (can sub coconut oil or avocado oil)

    • 1 tbsp vanilla

    • handful of dark chocolate chips (optional)

    Directions

    • In a medium bowl, whisk cassava flour and baking powder together, set aside.
    • In another bowl, add eggs and maple syrup and mix with an electric mixer until well combined.
    • Add melted butter and vanilla to egg/syrup mixture and continue mixing til all ingredients are well combined.
    • Pour this mixture into the dry ingredients and using the mixer, slowly combine all ingredients. The batter will thicken up a bit as it sits.
    • Preheat the waffle cone maker according to the manufacturer’s directions and begin making cones. While cones are still warm, we like to drop about 3-4 chocolate chips in the bottom so they melt. This creates the perfect “seal” so that your ice cream doesn’t drip out the bottom!
    • Makes approximately 12-18 cones depending on your waffle cone maker.
    • When using a gelatin egg or egg sub, keep in mind that the batter will become thicker as it sits, so by the time you’re about a half way through the batter, you’ll basically be able to roll it into balls and place in the maker. I’d probably suggest making a half batch at a time instead of a full batch.
    • For dairy free version, use equal amounts of coconut oil. They seem to crisp up faster for us than the butter version but this may vary depending on your iron.
    • For chocolate version, omit the 1 T vanilla, add 3 T cocoa powder to dry ingredients and add an additional 3 T maple syrup.
  • “tates & taco meat”

    “tates & taco meat”

    During this COVID quarantine time, you know what we’ve been craving a lot? Well, besides chocolate chip cookies and an easy one skillet meal. POTATOES, TATERS, TATES, SPUDS – the humble root veggie that comes in many shapes, colors and sizes. So naturally during a recent episode of “what should we have for dinner?” I realized there were some tates that needed to be used STAT.

    After remembering there was some ground beef that also needed to be used, a one skillet dish meal plan was made. To be honest, I had no idea this was actually already a dish. I knew that little potato cubes were perfect in our PATATAS BRAVAS BREAKFAST BOWL, so why not with some simple spices and ground beef?

    Apparently, this combo can be referred to as Picadillo and has many variations depending on the country of origin the recipe hails from. Sometimes tomatoes are added, green chilies, green olives (so gross), bell peppers, peas. The list goes on and on. So I’m guessing it’s a recipe that’s perfect for cleaning out the fridge and tossing in what you have.

    This variation is pretty basic, which I think is perfect. The simple flavors allow the taste of the grass fed beef to come forward as well as the subtle flavor of that loveable spud. The lime juice near the end of the recipe provides a wonderful tangy zing.

    A one skillet dish that’s great as a taco filling, as a topper for your morning scrambled eggs, layered on top of some greens or even on top of a baked potato! Sure, tates on tates! We use our favorite GROUND BEEF from BUTCHER BOX, delivered right to our door!

    A few other tasty recipes from our blog:

    “tates & taco meat”

    Recipe by MichelleCourse: Main Dish, Our Favorites!, Recipes, Whole30
    Servings

    4

    servings
    Prep time

    30

    minutes
    Cooking time

    40

    minutes

    Ingredients

    • 1 tblsp avocado oil

    • 1 lb grass fed ground beef

    • 1 medium russet potato

    • 1 tsp Redmond Real Salt

    • 1 tsp ground cumin

    • 1 tsp onion powder

    • 1 tsp granulated garlic

    • 1 tsp dried oregano

    • ¼ tsp chipotle chili powder (opt)

    • juice of 2-3 limes

    • handful of cilantro, roughly chopped

    Directions

    • Heat a 10” cast iron skillet over medium low heat. Add avocado oil and ground beef and break apart up with a silicone spatula and begin browning.
    • While beef begins cooking, wash potato, peel & dice into ½“ cubes, you’ll want about 1 cup (or a smidge more if you’re an avid tater fan) of diced tates.Lay them out flat on a cutting board and blot dry with a paper towel. This will help them brown up a bit. Toss into the pan with the ground beef and stir to combine. Let this cook for about 5-6 minutes.
    • Add salt, cumin, onion powder, garlic, oregano and chipotle chili powder (if using) and stir again to combine well. For the rest of the cooking time, you want to try and not over stir so that the potato cubes that have contact with the bottom of the pan can get some color on them.
    • Once beef is no longer pink and tates have some good color and are cooked all the way through, pour in the lime juice and stir. The liquid should deglaze the pan a bit and add some awesome flavor.
    • Taste and add more salt if needed. Toss in cilantro, stir and serve. A one skillet meal done in no time!

  • tomatillo chicken enchiladas

    tomatillo chicken enchiladas

    Another fun share from our ebook, Paleo Ole! filled with over 40 Paleo Mexican food recipes! Since we know Cinco de Mayo is right around the corner, it’s the perfect time! To be honest, this sauce is so amazing and easy to make. You’ll find other creative ways to use it like serving it on top of grilled chicken or veggies. Drizzle it on your scrambled eggs, make a marinade by adding more lime juice and avocado oil. So many possibilities!

    Now, back to the enchiladas, because who doesn’t love Paleo Mexican Food! We’ve used our CHICKEN CASERA as the filling because it’s delicious and simple tasting. This allows the sauce to shine a bit. We also use the TORTILLA RECIPE FROM OUR eBOOK. We think it’s the best cassava flour tortilla rendition around. Here’s a a little “Easter egg” for those of you that read the text here. Use the code, “$5DEAL” to grab a copy of our ebook for only $5! See, aren’t you glad you read this!?😉The tortilla recipe alone is worth it! You may be able to use a store bought variety like Siete Foods but have yet to try that out. If you happen to, please let us know how they turned out.

    The recipe makes about 2½ cups of sauce. The sauce is WHOLE30, enchiladas are NOT! So feel free to use this sauce to drizzle over roasted veggies or grilled meats if you’re doing a Whole30 or a Plant-based Whole30. Reserve a little bit to warm up and serve on the side. It makes for a fun condiment. Serve with the enchiladas and can easily be spooned over a side dish you might serve with the enchiladas. Or even just scooped up with some plantain chips!

    As always, enjoy! When you make this or any of our Paleo Mexican Food dishes, please tag us over on Instagram! We love to see folks enjoying our recipes!

    tomatillo chicken enchiladas

    Recipe by MichelleCourse: Main DishCuisine: southwesternDifficulty: easy
    Servings

    8

    enchiladas
    Prep time

    30

    minutes
    Cooking time

    35

    minutes

    a zesty dish, with a homemade tomatillo sauce, PALEO ENCHILADAS never had it so good

    Ingredients

    • tomatillo sauce
    • 1 lb tomatillos

    • 3 cloves of garlic

    • ½ medium sweet onion, peeled cut into ¾” wedges

    • 1 tbsp avocado oil

    • 1 serrano or jalapeño pepper (opt)

    • 1 cup chicken bone broth (sub veggie broth for vegan sauce)

    • 2 handfuls of cilantro, divided

    • 1 tsp fine sea salt

    • ¼ tsp chipotle chili powder (opt)

    • juice of ½ lemon

    • juice of ½ lime

    • enchiladas
    • 2 cups shredded casera chicken (sub sautéed veggies of choice for vegan), lightly salted with fine sea salt

    • 8 of our cassava flour tortillas

    • “cream cheese” sauce*

    • handful of cilantro, roughly chopped

    • toppings of choice

    Directions

    • MAKE THAT SAUCE! Remove papery skin from tomatillos and rinse off, place them on a baking sheet (whole) along with the garlic (skins on), onion and pepper. Drizzle avocado oil on top, rub all ingredients with your hands to coat with the oil.
    • Place under your broiler till everything is blistered!
    • Once cool enough to touch, cut the stems out of the tomatillos, remove skin from garlic, and cut stems off the pepper. Add those items along with the onions and any juices from the baking tray into a medium saucepan.
    • Add chicken broth, 1 handful of cilantro, salt, chipotle chile powder (if using), and lemon & lime juice. Stir to combine and let simmer for 12-15 minutes or until thickened up a bit.
    • Purée with immersion blender til smooth, finely chop up the other handful of cilantro and stir to combine. Taste and add more salt or lime juice if needed.
    • ASSEMBLY: Preheat oven to 375° – spray a 8″x8″ baking dish with avocado oil and pour about ½-¾ cup sauce to coat bottom.
    • Place a tortilla on a work surface, add about 2 tblsp chicken down the middle of the tortilla. Roll from one end to the other over the filling, place in a baking dish seam side down. Repeat with remaining tortillas placed in the pan right next to each other.
    • Pour sauce over the top of the enchiladas. The amount of sauce you pour over will be a personal preference. We like to leave the ends exposed a bit so we know where one enchilada ends and the next one begins. We also like to reserve a little to warm up and serve on the side.
    • Drizzle with “cream cheese” sauce, sprinkle with cilantro and additional toppings if using.
    • Cover with foil and bake for 20 minutes, remove foil and bake for an additional 10-12 minutes or until sauce is bubbly.
    • Remove from the oven, let sit for about 5 minutes before serving. Refrigerate any leftovers for up to a week. However, it’s doubtful they’ll last that long!
    • To make cream cheese sauce, place about 3 tbsps of dairy free cream cheese (we prefer Kite Hill) in a small bowl. Add a little coconut milk (or milk of choice) stirring to combine until a sour cream-like consistency is reached.
  • strawberry banana PUFFINS!

    strawberry banana PUFFINS!

    So why not? Sheet pan meals are all the rage right now, so why not a “sheet pan muffin” ~ YES! And so Back Porch Paleo “PUFFINS” were born and aren’t they just adorable!!! Not sure we can help ourselves from coming up with a few more fun ones! This recipe bakes up in a 13″ x 9″ sheet pan, so if you’ve got quite a crew, best double up the recipe and use a standard baking sheet. That way you’ll have PUFFINS a plenty! 😊

    We’ll call these a creative response due to the current world pandemic going on since “kitchen time” is totally therapeutic over here. The silver lining to all of this global COVID19 situation…more folks are in the kitchen than ever before. Which is awesome, since baking, cooking, creating and sharing with each other over meal prep is sure to create some fun memories.

    We think these would be perfect for a lazy weekend morning or even adding them to the menu for your next brunch celebration or get together. Never fear, we will be able to gather again at some point! I can feel it and personally am already meal planning our first family get together, as it will be such a joyous occasion.

    As always, please enjoy and have so much fun in the kitchen!

    strawberry banana sheet pan PUFFINS

    • Servings: 22-24 squares
    • Difficulty: easy
    • Print

    grain free, paleo strawberry banana puffins


    Credit: backporchpaleo.com

    Ingredients

    • 1½ cups Otto’s Cassava Flour
    • 2 tblsp coconut sugar
    • ¾ tsp baking powder
    • ½ tsp baking soda
    • ½ tsp Redmond Real Salt
    • 1 cup really ripe banana, mashed*
    • ½ cup fresh strawberries, mashed
    • ½ cup grass fed butter, melted & cooled slightly (can sub ghee or coconut oil)
    • ½ cup honey
    • 1 egg, room temperature
    • 1 tsp almond extract
    • ¾ cup dark chocolate chips
    • ½ cup freeze dried strawberries (optional)

    Directions

    1. Pre-heat oven to 385°, coat a 13″ x 9″ baking sheet (double the recipe for a standard sized baking sheet pan) with coconut oil, and line with parchment paper.
    2. In a medium bowl, combine cassava flour, coconut sugar, baking powder, baking soda and salt. Whisk to combine then toss chocolate chips (and freezedried strawberries if adding) into the bowl, set aside.
    3. In a separate bowl, mix bananas, strawberries, butter, honey, egg and almond extract. Whisk well to combine until egg is fully incorporated.
    4. Add wet ingredients to dry ingredients, using a spatula, mix until well combined and let it set for about 5 minutes.
    5. Pour batter into lined baking sheet, sprinkle with additional chips or a few slices of fresh strawberries. Bake for 22-24 minutes or until middle is set and bounces back when lightly touched and golden brown.
    6. Cool for 5-7 minutes in baking sheet, then slide carefully onto cooling rack. Wait to slice until nearly cooled. We think 2-2½” squares make for perfect finger food!
    7. *we have always used fresh bananas when baking, if you use frozen bananas that you thaw, you may need to adjust the amount of bananas down by about ¼ cup. Thawed bananas seem to be more liquidy.

  • paleo cinnamon swirl bread

    paleo cinnamon swirl bread

    A slight variation of our Paleo sandwich bread recipe with some sweet notes and boy does this loaf sing! Can you even imagine the Saturday Morning French toast possibilities!?

    Here are a few details:

    • Pan size makes a difference on this loaf. I used this pan which measures 7.75 x 3.75 x 2.75″ – little bit smaller than your standard loaf pan, but gave the best results. If you use a standard pan, your loaf will be a bit shorter.
    • Use a double layer of parchment paper that extends above the rim by at least 3″ on all sides so you can then fold down the excess into the loaf pan leaving 1.5″ on all sides, this provides added structure as the bread rises/bakes. (see pic below)
    • You may not use all the maple sugar cinnamon called for, but simply save for your next craving of cinnamon toast! You’ll be tempted to coat the top with some of the cinnamon sugar before baking, but I found that more than anything, it just burned and left a blah taste rather than adding a crunchy top.
    • If you’re going to freeze the loaf, definitely slice beforehand so you can take out a few slices as needed to thaw and enjoy.

    Links to our favorite items used in this recipe:

    paleo cinnamon swirl bread

    • Difficulty: easy
    • Print

    paleo cassava flour cinnamon swirl bread


    Credit: backporchpaleo.com

    Ingredients

      bread
    • ¼ cup warm water (110°)
    • 1 tblsp honey
    • 2 tsps quick rise yeast
    • ⅓ cup grass fed butter, softened (or ghee)
    • 4 lg. eggs, room temperature
    • ½ cup mashed potatoes, room temp & preferably day old** – can sub pumpkin puree
    • 1½ tsps Redmond Real Salt
    • ½ cup additional water (110°)
    • 1¾ cup Otto’s Naturals Cassava Flour
    • 1 egg, whisked in a small cup for egg wash
    • cinnamon swirl
    • ½ cup maple sugar
    • 1 tblsp ceylon cinnamon

    Directions

    1. Preheat oven to 400° – coat loaf pan with coconut oil and line with double folded parchment paper with enough to extend above the rim about 1½” on all sides (see photo below), set aside.
    2. Combine ¼ cup warm water, honey and yeast. Whisk well and allow yeast to bloom. This can take anywhere from 5-10 minutes. Make sure it’s VERY happy and bloomed.
    3. While yeast blooms, in a medium sized bowl, add butter, eggs, mashed potatoes and salt. Using a hand mixer, beat until well combined.
    4. Add cassava flour to a large bowl. Once yeast is fully bloomed pour that into the flour, along with the butter/egg mixture and the additional ½ cup warm water. Beat on slow speed til combined then beat on medium high speed for about a minute to fully combine. Let it set for 5 minutes. You should have approximately 3 cups of dough/batter.
    5. Scoop approximately 1¾ cups batter into bottom of parchment lined loaf pan, spread to fully cover the bottom of the pan. Sprinkle ¼ cup of the cinnamon sugar on top. With a butter knife, swirl slightly down the center from one end to the other. Of the batter remaining, spoon half into the loaf pan in dollops and carefully smooth to cover the first layer of cinnamon sugar. Sprinkle 2+ tblsp more of the cinnamon sugar and repeat swirling with butter knife. Spoon the remaining batter in dollops on top and smooth out. Apply egg wash (if using) with a pastry brush.
    6. Cover with a kitchen towel, place in a warm area of your kitchen and let rise for 20-25 minutes or until batter rises about an inch above the rim of the pan extending up into the parchment paper “wall”.
    7. Place in oven and REDUCE OVEN TEMP TO 385° – bake for 40-45 minutes or until top is golden brown and toothpick inserted comes out clean. Remove from oven. Allow to cool for 4-5 minutes and remove to a wire rack to finish cooling
    8. Best served the day of, but can be sliced and stored in the fridge and enjoyed the next day. **mashed potatoes – simple leftover kind, made with grass fed butter, salt and a little full fat coconut cream! Also, red or Yukon gold taters make for the best dough!
Adding a double layer of parchment is KEY and provides the added structure necessary to allow this loaf to rise/bake to capacity!

  • Paleo soft sugar cookies w/ “cream cheese” frosting

    Paleo soft sugar cookies w/ “cream cheese” frosting

    sugar cookies

    Paleo SOFT SUGAR COOKIES! Another family remake of a beloved recipe we used to make EVERY year for Christmas. A tradition that had been taking place for well over 25 years before we took the Paleo route.

    I’d always avoided trying to recreate this soft sugar cookie recipe because it called for sour cream and wasn’t sure how to get around that. However, with the onset of so many fabulous non diary ingredients available today, I knew it was time to have a go at remaking them! I am thrilled with the results of these new Paleo SOFT SUGAR COOKIES and could not be happier about being able to pick this tradition back up and make it a part of our family traditions again.

    This recipes makes A LOT of cookies, so gather your family and friends together and have a cookie making party! It’s the best time of year to find a “reason” to get together and create memories in the kitchen. Send everyone home with a plate (or two) of cookies!

    paleo sugar cookies

    The best size of cookie was using a 2½’ round cookie cutter. By all means rummage through your cookie cutter bin and find some cutters that might work for you. Avoid going any larger as bake times might be affected and edges might be done before the middle.

    I tested several variations, with great results and have listed a couple subs you can use in the list of ingredients. Couple things to note:

    • If you choose to use organic sugar, your cookies will have a more traditional color to them. Maple sugar has a more golden color and the cookies will as well. A tasty cookie either way, with varying flavor profiles. Same goes for the frosting, if you use a powdered maple sugar* it will have more of a golden hue to it.
    • If you roll the cookies out thicker than ¼” they will tend to puff up more and crack a bit. Doesn’t affect the bake or taste of the cookie, but keep that in mind if you’re not going to frost them. The tops will not be as smooth.
    • You can make this dough in advance and store in the refrigerator wrapped in plastic. Let it come up to room temperature before rolling.
    • Sprinkles and/or food coloring. Let’s keep things real here, not all sprinkles and food coloring are created equal and I know that. 😉There are great, naturally colored options available for both, but not so festive. For me, and since it’s one time a year, I opted for some fun sprinkles to keep them festive. YOU DO YOU, and do what works best for you current health situation m’kay.
    • *To make maple powdered sugar, combine 1 cup maple sugar & 1 tbl tapioca starch in a high speed blender (I used a blendtec) and blend for about 30-45 seconds. Place a kitchen towel on top of the lid to keep a fine mist of powder from getting all over your counter top! You should get a perfect powdered sugar…I got almost 2 cups! Your results might be different depending on your blender.

    paleo soft sugar cookie w/ “cream cheese” frosting

    Recipe by MichelleCourse: DessertCuisine: AmericanDifficulty: easy
    Servings

    60

    cookies
    Prep time

    25

    minutes
    bake time

    8

    minutes

    Ingredients

    • cookies
    • 1 cup dairy free plain yogurt/sour cream, or organic sour cream if you tolerate dairy

    • 1 tsp baking soda

    • 3½ cups cassava flour

    • 2 cups maple sugar, or organic sugar

    • 2 tsp baking powder

    • ½ tsp fine sea salt

    • 1 cup grass fed butter, melted & slightly cooled – or ghee

    • 3 large eggs, room temperature

    • 1 tsp fresh lemon juice

    • 1 tsp vanilla

    • “cream cheese” frosting
    • ½ cup ghee, or softened grass fed butter

    • 8 oz dairy freel cream cheese spread, or organic cream cheese

    • 2 tsp vanilla

    • 3½-4 cups powdered maple sugar* or organic powdered sugar

    • sprinkles or coloring for decorating (opt)

    Directions

    • Line two baking sheets with parchment paper and preheat the oven to 400°.
    • In a small bowl, combine yogurt (or sour cream if using) and baking soda. Stir to combine and set aside. Be aware, this mixture will bloom a bit because of the chemical reaction, so make sure your bowl can accommodate this.
    • In a large bowl, add cassava flour, maple sugar, baking powder and salt. Whisk together and set aside.
    • In a medium sized mixing bowl, add melted butter (or ghee), eggs, lemon juice and vanilla. Mix well with a hand mixer until eggs are thoroughly combined. Pour into dry ingredients and mix again til well combined. Mixture should have the consistency of wet, clumpy sand.
    • Add bloomed yogurt mixture to the dough and continue mixing until the dough comes together enough that you can use your hands to roll it into a large ball. Divide into two dough balls and keep one covered while you roll out cookies from the first.
    • Roll dough out in between two pieces of well dusted parchment paper to ¼” thick. Cut out into desired shapes, place on a baking sheet about ½” apart. They don’t spread too much, but you don’t want them touching. Re-roll crust scraps and cut out cookies until the baking sheet is full. Bake for 7-9 minutes until the edges just become brown. Remove from the oven, let them cool slightly on the baking sheet and then remove to the cooling rack. Repeat with remaining dough.
    • Once cookies are all baked/cooled, prepare frosting by adding ghee, cream cheese and vanilla to a large mixing bowl. Using a hand mixer, whip on high speed until well combined. Add 2 cups of the powdered sugar and mix well. From here, continue adding powdered sugar until you reach a desired consistency. I like using nearly 4 cups, but depending on the ingredients you use you may not need as much. Frost and decorate cookies as desired.

  • pink grapefruit chia pudding

    pink grapefruit chia pudding

    It’s so fun to see the seasonal fruits of the season hit the market and one we always look forward to this time of year is the arrival of grapefruit!

    This citrus gem has always been a family favorite, like FOREVER! I grew up in Colorado where citrus trees did not grow, however my mom’s folks lived in Arizona and had all the citrus trees in their yard. Lemon, lime and the biggest…grapefruit!! So I remember having boxes arrive at our home full of all three fruits, but the bulk of the boxes were grapefruits!!! They weren’t huge, but they were so delicios, so we often had two at a sitting. When we’d visit them in Arizona, we’d always enjoy them picked each morning right off the tree…wow, so many warm memories associated with that tree in their front yard! This is where my siblings and I would grab a stool, climb right up and retreat to and ditch the “heat” that is so abundant there in Arizona! Many long afternoons were spent up in that old tree…eating lunch and sucking on popsicles!

    I snapped this picture of the ol’ tree back in 2004 when I was there packing up my grandparents to move from their home of nearly 50 years to be close to my mom in St. George, Utah. The tree had no fruit at that time but the memories where as thick as the grass under my toes. It was a sad farewell to this grand ol’ tree so I just had to take the picture to retain it in my memory.

    This year as the grapefruit arrived at Costco I knew that I had to come up with something special to commemorate all the memories. The grapefruit is paired with pomegranate seeds for tender memories – grapefruit reminds me of my grandparents and their home in Arizona and the pomegranate seeds remind me of my angel momma’s home in St. George, Utah where pomegranate trees grow abundantly. A pairing of memories as we head into the holidays – a time to remember family members who have gone on before us, all the family that surrounds us here and the blessings which we all have in abundance.

    The chia pudding is flavored with the pink grapefruit juice and a bit of zest…so good! The beauty are those segments and pom seeds – such an eye pleaser! I added the pistachio’s for a contrast of color and texture…so as it turns out, it ended up being the perfect dish for any holiday morning! Prep everything the day ahead and you’re all set for an easy dish the next morning!

    Hope you enjoy the dish and that it may create special memories for you and your family!

    pink grapefruit chia pudding

    • Servings: 2-4
    • Difficulty: easy
    • Print

    the perfect make ahead holiday breakfast dish


    Credit: backporchpaleo.com

    Ingredients

    • 1 can full fat coconut
    • juice of 1 pink grapefruit, approx. ½ cup
    • ½ tsp pink grapefruit zest
    • ¼ cup chia seeds
    • 3-4 tblsp honey
    • pinch of Redmond Real Salt
    • 2 drops doterra grapefruit essential oil (opt)
    • pink grapefruit segments, pomegranate seeds & chopped pistachios for garnish or nut of choice

    Directions

    1. Combine coconut milk, grapefruit juice, zest, chia seeds, honey, salt and essential oil if using. Stir with a whisk and make sure chia seeds are all separated and well dispersed. Place in the fridge for about 15 minutes and then whisk again. It should be thickening up. Now, depending on the brand of coconut milk you use, it could be the right consistency or you may need to add more chia seeds if you want it thicker or possibly more coconut milk if it’s already too thick. It really will just vary depending on the brand. Taste for flavor and add more honey at this point if you need to. Place back in fridge and let set overnight.
    2. Prepare grapefruit segments and pom seeds…which you can also do ahead of time and is a huge time saver. Both the segments and the pom seeds can be stored in the fridge for a couple days.
    3. The next morning, spoon a little pudding into serving bowl, and if you have a clear bowl make sure they’re around the outside so they show!! Spoon more pudding on top and then add grapefruit segments, more pom seeds and chopped pistachios or nuts of choice.
    4. Holiday morning breakfast…done!
  • Paleo & Whole30 crispy ham & potato stacks

    Paleo & Whole30 crispy ham & potato stacks

    Had the wonderful opportunity to come up with a creative new way to pair a Pederson’s Farms holiday ham and a Primal Kitchen sauce for a recipe collaboration. What a treat to be asked!

    For us, a holiday ham means there will be potatoes! So, instead of having a dish of ham as well as a dish that was potato based, why not combine them?! What a wonderful idea that was. These stacks may look like they take lots of time, but really it’s slices of thin potatoes stacked with rounds of ham and baked in the oven. You totally got this!

    Best thing? Pederson’s Farms holiday ham is Whole30 approved as is the Primal Kitchen Golden BBQ sauce. Which isn’t to say that you have to be on a “Whole30″ to make this dish, it simply means that there’s no added sugar in either ingredient. Who really needs all that sugar with ham and potatoes anyways right? Enjoy and know that you won’t find your blood sugar crashing after enjoying this holiday dish. These are sure it’s to be a classic favorite!

    crispy ham and potato stacks

    • Servings: 12
    • Difficulty: easy
    • Print

    Paleo & Whole30 holiday ham & potato dish


    Credit: backporchpaleo.com

    Ingredients

    • ¼ cup grass fed butter, melted (sub ghee for Whole30)
    • 24 2½” Pederson’s Farms Holiday Ham rounds (omit for Vegan)
    • 1 tblsp fresh rosemary, finely diced
    • 1 tblsp fresh thyme, finely diced
    • 1 tsp kosher salt
    • ½ cup Primal Kitchen Golden BBQ Sauce
    • 2 tblsp mayonnaise
    • 6-7 Yukon gold potatoes
    • avocado oil to coat tins
    • additional kosher salt and herbs for garnish (optional)

    Directions

    1. Preheat oven to 385° – prepare muffin tins by lightly brushing bottom and sides with avocado oil. Melt butter and set aside while prepping the other ingredients.
    2. To prepare ham, use a 2½” biscuit/cookie cutter and cut out 24 rounds of ham, set aside. You should get 5-6 rounds per slice of ham. Save scraps for later use.
    3. In a large bowl, toss in fresh herbs and salt. Prepare sauce by adding bbq sauce and mayonnaise to a small bowl, stirring to combine well and set aside.
    4. Slice potatoes around ⅛” thick (a mandoline is best for this) – if there is a lot of moisture on the potatoes after slicing, use a paper towel to blot it off then toss them into the bowl with the herbs/salt.
    5. Drizzle melted butter over the potatoes, toss to coat and combine with the herbs and salt, using your hands to separate slices of potatoes to insure even coating.
    6. Assemble by placing roughly 5-6 slices of potatoes in the bottom of each tin, followed by a round of ham, then another layer of slices of potatoes, another round of ham and then ending with slices of potatoes. Place in the oven and bake for 40-50 minutes or until potatoes are golden and edges are crispy. Let the stacks cool slightly in the tins for 5 minutes, then run a small spatula around the edges and bottom to release from tin and place on serving platter. Sprinkle with additional kosher salt and herbs (if using) and serve with sauce.
    7. For plant-based Whole30 or Vegan, omit ham & increase the potatoes